WP Masonry PRO Documentation

Introduction

WP Masonry PRO is a sophisticated WordPress theme by ThemesDNA designed to showcase content through a modern Masonry grid layout. Emphasizing a clean and minimalistic aesthetic, this responsive theme ensures your posts and pages are displayed elegantly across all devices. Enhancements such as sticky menus, sidebars, and customizable footers support seamless navigation, while features like social buttons and scroll-to-top functionality enrich user interaction.

The PRO version expands on the free theme’s functionalities by offering extensive customization options including multiple grid layouts with up to five columns and various thumbnail styles to tailor post presentations. It supports dual navigation menus, versatile header configurations, and advanced widgets such as featured posts, news tickers, and social profiles, enhancing both the appearance and usability of your site. With additional built-in tools like a contact form and related posts with thumbnails, WP Masonry PRO caters comprehensively to professional bloggers and content creators.

This theme accommodates different layout preferences for singular and non-singular pages and offers a rich selection of custom page and post templates. Its user-friendly theme options allow easy management of colors, fonts, and site structure, making it ideal for users seeking both flexibility and visual appeal. WP Masonry PRO represents a robust solution for those wanting a distinctive grid-based WordPress theme that balances functionality with style.

You can explore the theme live, purchase it, or view a full homepage screenshot using the buttons below:

Current Theme Version: 1.0.6

Theme Installation

After purchasing the WP Masonry PRO WordPress Theme, you'll receive a download link via email. Check your email inbox (or spam folder) for the product delivery email. Click the provided download link to download the theme's .zip file to your computer. Follow one of a method given below to install the theme on your website.

Upgrading from the Free WP Masonry Theme?

WP Masonry PRO is a separate theme. Whether or not you're currently using the free WP Masonry theme, you need to install WP Masonry PRO using one of the methods below.

If you're upgrading from the free version, most of your existing WordPress Customizer settings will remain in place. So you don't need to reconfigure everything from scratch. However, you will need to reupload a few images and reapply specific color settings.

After activating WP Masonry PRO, go to Appearance → Customize and reupload the following:

  • Site Logo
  • Site Icon (favicon)
  • Header Image
  • Background Image

If you changed below color options in the free version, reapply them in Appearance → Customize → Theme Options → Colors:

  • Header Text Color
  • Background Color

Tip: You can install PRO without deleting the free theme. Use Live Preview to confirm your layout, then click Activate & Publish.

Method 1: Install Using the WordPress Dashboard (Easiest and Fastest)

This is the easiest and fastest method to install this WordPress theme.

  1. Go to "WordPress Dashboard" → "Appearance" → "Themes" and click on "Add New" button.
  2. Click on "Upload Theme" button and choose the zip file you have downloaded.
  3. Click on "Install Now" button.
  4. Activate the theme.
  5. Now go to "Appearance" → "Customize" to configure theme options.

Method 2: Install using cPanel File Manager

In some cases, you may not be able to install a WordPress theme through the WordPress dashboard—especially if the theme's ZIP file exceeds the maximum upload size limit. When this happens, you can install the theme using cPanel's File Manager, which is often simpler than using FTP. Follow the steps below to install your theme via the File Manager in cPanel.

  1. Log in to your cPanel account. Your cPanel URL will be https://yourdomain.com/cpanel or a similar URL.
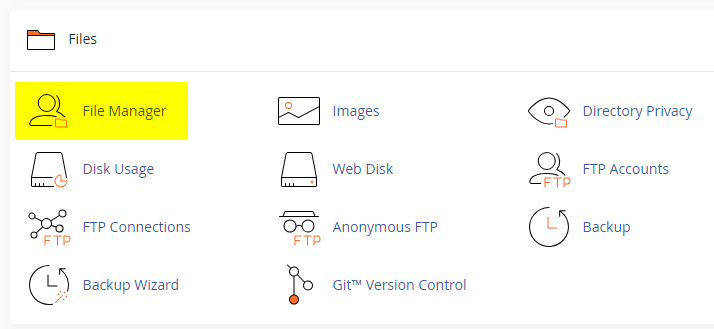
  2. Click on the "File Manager" icon. It's usually under the "Files" section.
  3. You are now in the "File Manager". Open the public_html folder, which is your website's root directory.
  4. Locate the wp-content folder inside "public_html," then open the themes folder inside of it.
  5. In the File Manager interface, click the "Upload" button and choose the theme's .zip file from your local drive.
  6. After it has been uploaded, right-click the .zip file and choose "Extract" or "Unzip".
  7. You can now delete the uploaded .zip file, but it's optional.
  8. Log in to your WordPress dashboard through your web browser.
  9. Go to Appearance → Themes. Now you will see the newly extracted theme.
  10. Make it your active theme by clicking the "Activate" button next to it.

Note: If your hosting provider doesn't offer cPanel, look for a File Manager option in your hosting dashboard (like DirectAdmin, Plesk, or CyberPanel). The process is usually very similar—just find the wp-content/themes folder and upload/extract the theme ZIP file there.

Method 3: Install using FTP

Installing a WordPress theme via FTP is straightforward, though it involves a few more steps compared to using the built-in theme uploader. Here's how to install a WordPress theme using FTP:

  1. Unzip the theme's .zip file you have downloaded.
  2. Connect to your hosting account using an FTP client such as "FileZilla" or "Core FTP".
  3. Navigate to the /wp-content/themes folder in the "Remote site" section.
  4. In the "Local site" section, locate the unzipped theme folder.
  5. Drag and drop the unzipped theme folder from the "Local site" section to the "Remote site" section.
  6. Be patient and let the transfer finish.
  7. Once the transfer is complete, log in to your WordPress dashboard and navigate to Appearance > Themes.
  8. Find the theme you just uploaded and click Activate.

Troubleshooting Tips

  • Didn't receive the download email? Wait 5–10 minutes or check your spam/junk folder. But if you still can not find this email or download link is broken, please inform us. we will send it ASAP.
  • "The uploaded file exceeds the upload_max_filesize directive in php.ini." - If you get this error when following the "Method 1", follow this tutorial: https://themesdna.com/blog/increase-maximum-file-upload-size-wordpress/
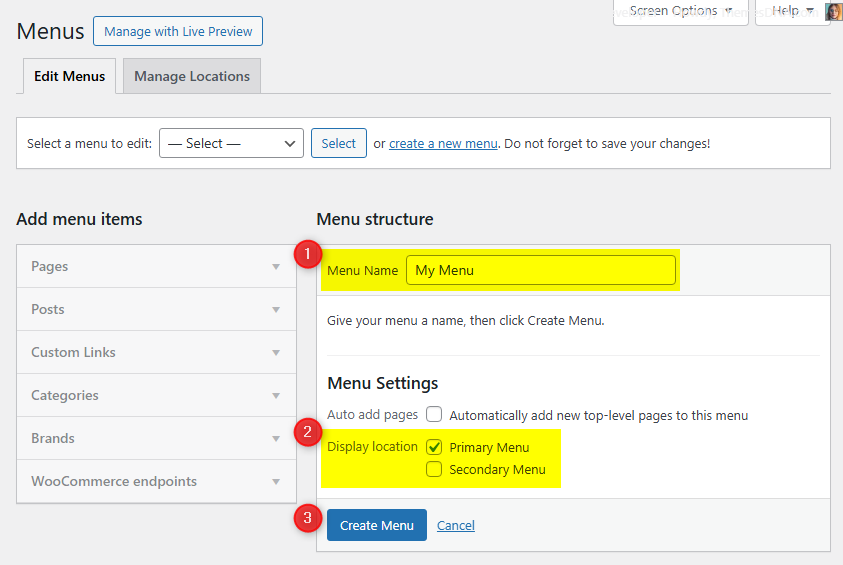
  • My menus disappeared or look different. Go to Appearance → Menus → Manage Locations and reassign your menus to the correct locations.
  • My header text or background color looks different after activating PRO. Reapply your colors in Appearance → Customize → Theme Options → Colors for Header Text Color and Background Color. Then publish.
  • Still can't install the theme? Contact us for help.

Import Demo Content

You can import the demo content, widgets, and Customizer settings shown in the WP Masonry PRO theme demo using one of the two methods below.

Manual Demo Import

You can also import the content, widgets, and Customizer settings manually by following these three steps:

Step 1: Import Main Site Content

This includes: Posts, pages, menus, media, categories, tags, comments, and custom fields.

  1. Download Content File: Download XML File
  2. Go to Tools → Import.
  3. Under "WordPress", click Install Now if not already installed.
  4. Click Run Importer.
  5. Select the downloaded XML file and click Upload file and import.
  6. Map authors to users, check "Download and import file attachments", and click Submit.

Step 2: Import Widgets

  1. Install and activate the Widget Display Conditions plugin (optional, for visibility control).
  2. Install and activate the Widget Importer & Exporter plugin.
  3. Go to Tools → Widget Importer & Exporter.
  4. Click the "copy and paste" link to open a textarea.
  5. Copy content from: Widgets .wie File and paste into the box.
  6. Click Import Widgets.

Step 3: Import Customizer Settings

  1. Download File: Download Customizer File
  2. Install and activate the Customizer Export/Import plugin.
  3. Go to Appearance → Customize → Export/Import.
  4. Select the downloaded `.dat` file, check "Download and import image files?", and click Import.

Regenerate Thumbnails

If your website already has existing posts with featured images, it's highly recommended to regenerate thumbnails after activating the WP Masonry PRO theme. This ensures that all images match the new theme's layout and display sizes.

Regenerating thumbnails is optional if your site is completely new and doesn't have any uploaded images yet.

However, if you imported the demo content, regenerating thumbnails is essential to display images correctly across the site.

  1. Install and activate the Regenerate Thumbnails plugin.
  2. Go to Tools → Regenerate Thumbnails.
  3. Click the "Regenerate Thumbnails for All x Attachments" button to start the process.
  4. Wait until all images are regenerated. This may take a few minutes depending on your media library size.
  5. If you want, you can deactivate and delete the plugin once the process is complete.

This step ensures clean image alignment and sharp visuals throughout your website using the WP Masonry PRO theme.

Header Image

Quick Start Guide

WP Masonry PRO theme allows users to upload their very own site-wide custom header image with custom title and description to obtain a much more personalized look and feel. Also they can upload an unique header image for each post/page with unique title and description replacing the site-wide header image and its title/description.

There are many header image options in WP Masonry PRO:

  1. Header image options in Theme Customizer
  2. Header image options in post edit screen
  3. Header image options in page edit screen

How to Add a Header Image?

There are 3 types of header images in this theme:

  1. Site-wide Header Image : Appearance → Customize → Theme Options → Header Image
  2. Header Images of Posts : Post’s Edit Screen → “Post Settings – WP Masonry PRO” Meta Box → Site Header Image
  3. Header Images of Pages : Page’s Edit Screen → “Page Settings – WP Masonry PRO” Meta Box → Site Header Image

How to Add a Site-wide Header Image?

Site-wide header image will be displayed everywhere on your website. But if you add a header image to a post/page using settings of that post/page, site-wide header image will be replaced by that header image.

  1. Go to AppearanceCustomizeTheme OptionsHeader Image
  2. Upload your header image using Add new image button.

How to Add a Header Image to a Post?

You can set a different header image for each post.

  1. To set a header image to a post, go to edit screen of that post.
  2. Find the Post Settings - WP Masonry PRO meta box.
  3. Add your image URL or upload an image using Site Header Image option.

How to Add a Header Image to a Page?

You can set a different header image for each page. To set a header image to a page, go to edit screen of that page. Find the Page Settings - WP Masonry PRO meta box.
Add your image URL or upload an image using Site Header Image option.

How to Add a Custom Title/Description to Header Image?

By default, the theme displays your website's title as the header image title and the tagline as the header image description. However, you can replace both with custom title and description.

First, you need to enable the display of custom header image title and description sitewide. To do this, go to AppearanceCustomizeTheme OptionsHeader Image and check the option Add Custom Title/Custom Description to Header Image and save settings.

Add a Custom Title/Description to Site-wide Header Image:

  1. Go to AppearanceCustomizeTheme OptionsHeader Image
  2. Add your custom header image title to Header Image Custom Title text field.
  3. Add your custom header image description title to Header Image Custom Description text field.
  4. Save settings.

How to Add a Custom Title/Description to the Header Image of a Post?

You can assign a unique title and description to the header image of each post. These will override the sitewide header image title and description.

  1. Go to the edit screen of that post.
  2. Find the Post Settings - WP Masonry PRO meta box.
  3. Use Site Header Image Title and Site Header Image Description options for adding a title and a description.
  4. Update the post.

How to Add a Custom Title and Description to the Header Image of a Page?

You can assign a unique title and description to the header image of each page. These will override the sitewide header image title and description.

  1. Go to the edit screen of that page.
  2. Find the Page Settings - WP Masonry PRO meta box.
  3. Use Site Header Image Title and Site Header Image Description options for adding a title and a description.
  4. Update the page.

How to Hide Title/Description from Header Image?

  1. Go to AppearanceCustomizeTheme OptionsHeader Image.
  2. Check the option Hide both Title and Description from Header Image and save settings.
  3. Save settings.

Note: This option will hide both header image title and header image description sitewide.

News Ticker

The News Ticker in the WP Masonry PRO theme is a lightweight, eye-catching feature that displays your posts in a smooth, horizontal scrolling format at the top of your site. It's perfect for highlighting breaking news, trending updates, or featured content with a continuous stream of headlines that captures visitors' attention. Fully customizable via the WordPress Theme Customizer, you can easily enable or disable the ticker, set a custom label, define the number of posts to display, and filter content by recent posts, a specific category, a specific tag, or manually entered post IDs. This feature adds a dynamic touch to your website while keeping readers informed of key updates.

How to Configure the News Ticker

You can activate and customize it via the WordPress Theme Customizer.

Step 1: Access the News Ticker Options

  1. Go to your WordPress Dashboard.
  2. Navigate to Appearance → Customize.
  3. Click on Theme Options → News Ticker Options.

Step 2: Enable the News Ticker

Find the option Enable News Ticker and toggle the switch to Yes to activate the news ticker on your site.

Step 3: Configure Ticker Options

👉 Check the complete list of "News Ticker Options" available

Step 4: Save Changes

Once you've configured the settings, click the Publish button at the top of the Customizer to apply the changes.

Tips

  • Use Posts by IDs to curate exactly which headlines appear.
  • Use Tag Posts or Category Posts for automated updates within a topic.
  • Adjust duration and width values for responsiveness and readability.

Custom Widgets

Quick Start Guide

To see available widgets and widget areas please navigate to WordPress DashboardAppearanceWidgets. You can drag and drop widgets into widget areas you like. Widgets page will look like this: WP Masonry PRO Widgets and Widget Areas

There are 6 custom widgets bundled with the WP Masonry PRO theme.

  1. WP Masonry Featured Posts - Style 1
  2. WP Masonry Featured Posts - Style 2
  3. WP Masonry Tabbed Widget
  4. WP Masonry About Widget
  5. WP Masonry Social Buttons

WP Masonry Tabbed Widget

This widget displays posts in a tabbed format with three distinct tabs: Popular Posts (based on comment count), Recent Posts (based on publication date), and Random Posts. Each tab can be independently enabled or disabled, and the display of various post elements can be customized.

Key Features

  • Three Tab Types: Popular (most commented), Recent (newest), and Random posts
  • Flexible Configuration: Each tab can be individually enabled/disabled
  • Customizable Tab Names: Rename each tab to match your site's terminology
  • Display Options: Control which post elements to show (thumbnail, author, date, comments, snippet)
  • Thumbnail Support: Displays featured images with fallback to default image
  • Snippet Control: Configure the length of post content preview

Usage Notes

  • Tab Visibility: At least one tab must be enabled for the widget to display content
  • Popular Posts Logic: Popular posts are determined by comment count (highest first)
  • Thumbnail Size: Uses the 'wp-masonry-mini-image' image size - ensure this size is registered in your theme
  • Fallback Image: If no featured image is set, displays a default image from /assets/images/no-image-small.png
  • Performance: Random posts tab may have slight performance impact on sites with large post databases
  • Sticky Posts: Sticky posts are excluded from all queries (ignore_sticky_posts=1)

Below is the complete list of options available in the "WP Masonry Tabbed Widget":

Option ID Option Name Description Control Type Accepted Value Default
title Title Widget title displayed above the tabbed interface. Text Any text string. Tabbed Widget
show_popular_posts Display Tab 1 (Popular Posts) Enable or disable the Popular Posts tab. Checkbox true / false true
show_recent_posts Display Tab 2 (Recent Posts) Enable or disable the Recent Posts tab. Checkbox true / false true
show_random_posts Display Tab 3 (Random Posts) Enable or disable the Random Posts tab. Checkbox true / false true
tab_one_name Tab 1 Name Custom name for the first tab (Popular Posts). Text Any text string. Popular
tab_two_name Tab 2 Name Custom name for the second tab (Recent Posts). Text Any text string. Recent
tab_three_name Tab 3 Name Custom name for the third tab (Random Posts). Text Any text string. Random
number Number of posts to show Number of posts displayed in each tab. Text A positive whole number. 3
show_thumbnail Display Post Thumbnail? Show post featured images. Checkbox true / false true
show_author Display Post Author? Show post author name with link to author archive. Checkbox true / false false
show_date Display Post Date? Show post publication date. Checkbox true / false true
show_comments Display Number of Comments? Show comment count with link to comments section. Checkbox true / false true
show_snippet Display Post Snippet? Show excerpt from post content. Checkbox true / false true
snippet_length Post snippet length (number of words) Number of words to display in the post snippet. Text A positive whole number. 20

Tab Content Details

Tab Query Parameter Sort Order Description
Tab 1 (Popular) orderby=comment_count Descending (highest comment count first) Displays posts with the most comments
Tab 2 (Recent) orderby=date Descending (newest first) Displays most recently published posts
Tab 3 (Random) orderby=rand Random Disposts posts in random order

Common Parameters Applied to All Tabs

  • posts_per_page: Set by the "Number of posts to show" option
  • nopaging=0: Disables pagination
  • post_status=publish: Only shows published posts
  • ignore_sticky_posts=1: Excludes sticky posts from results
  • post_type=post: Only includes standard posts (not pages or custom post types)

WP Masonry About Widget

This widget displays an "About Me" section with a profile image, personal description, and extensive social media links. It's designed for personal blogs, portfolio sites, or any website where you want to introduce yourself to visitors.

Key Features

  • Display a custom profile image with automatic alt text
  • Add a detailed personal or professional description with HTML support
  • Include links to 30+ different social media platforms
  • Choose between round or normal social button styles
  • Properly sanitized inputs for security
  • Responsive design ready
  • Uses Font Awesome icons for social media buttons
  • Links open in new tabs with nofollow attributes for SEO

Usage Notes

  • Ensure Font Awesome is enqueued in your theme for social icons to display properly
  • For profile images, use optimized, square images for best results
  • The description field supports HTML tags (with security filtering)
  • Social media links require full URLs (e.g., https://facebook.com/username)
  • Email and Skype links use appropriate protocols (mailto: and skype:)
  • All social links include target="_blank" and rel="nofollow" attributes
  • Round buttons option adds circular styling to social media icons

Below is the complete list of options available in the "WP Masonry About Widget":

Option ID Option Name Description Control Type Accepted Value Default
title Title Widget title displayed above the about section. Text Plain text About Me
image Profile Image URL URL to your profile image. Will be displayed above the description. Text (URL) Valid image URL (empty)
description Description Personal or professional description about yourself. Supports HTML. Textarea Text with basic HTML tags (empty)
round_buttons Display round social buttons? Toggles between round and normal social media button styles. Checkbox true / false false
facebook Facebook URL Your Facebook profile or page URL. Text (URL) Valid URL (empty)
twitter Twitter URL Your Twitter profile URL. Text (URL) Valid URL (empty)
googleplus Google Plus URL Your Google Plus profile URL. Text (URL) Valid URL (empty)
pinterest Pinterest URL Your Pinterest profile URL. Text (URL) Valid URL (empty)
linkedin LinkedIn URL Your LinkedIn profile URL. Text (URL) Valid URL (empty)
instagram Instagram URL Your Instagram profile URL. Text (URL) Valid URL (empty)
flickr Flickr URL Your Flickr profile URL. Text (URL) Valid URL (empty)
youtube YouTube URL Your YouTube channel URL. Text (URL) Valid URL (empty)
vimeo Vimeo URL Your Vimeo profile URL. Text (URL) Valid URL (empty)
soundcloud SoundCloud URL Your SoundCloud profile URL. Text (URL) Valid URL (empty)
lastfm Last.fm URL Your Last.fm profile URL. Text (URL) Valid URL (empty)
github GitHub URL Your GitHub profile URL. Text (URL) Valid URL (empty)
bitbucket Bitbucket URL Your Bitbucket profile URL. Text (URL) Valid URL (empty)
tumblr Tumblr URL Your Tumblr blog URL. Text (URL) Valid URL (empty)
digg Digg URL Your Digg profile URL. Text (URL) Valid URL (empty)
delicious Delicious URL Your Delicious profile URL. Text (URL) Valid URL (empty)
stumbleupon StumbleUpon URL Your StumbleUpon profile URL. Text (URL) Valid URL (empty)
reddit Reddit URL Your Reddit profile URL. Text (URL) Valid URL (empty)
dribbble Dribbble URL Your Dribbble profile URL. Text (URL) Valid URL (empty)
behance Behance URL Your Behance portfolio URL. Text (URL) Valid URL (empty)
vk VK URL Your VK (VKontakte) profile URL. Text (URL) Valid URL (empty)
codepen CodePen URL Your CodePen profile URL. Text (URL) Valid URL (empty)
jsfiddle JSFiddle URL Your JSFiddle profile URL. Text (URL) Valid URL (empty)
stackoverflow Stack Overflow URL Your Stack Overflow profile URL. Text (URL) Valid URL (empty)
stackexchange Stack Exchange URL Your Stack Exchange profile URL. Text (URL) Valid URL (empty)
buysellads BuySellAds URL Your BuySellAds profile URL. Text (URL) Valid URL (empty)
slideshare SlideShare URL Your SlideShare profile URL. Text (URL) Valid URL (empty)
skype Skype Username Your Skype username (not full URL). Text Skype username (empty)
envelope Email Address Your email address for contact. Text (Email) Valid email address (empty)
rss RSS Feed URL URL to your RSS feed. Text (URL) Valid URL (empty)

WP Masonry Social Buttons Widget

This widget displays a collection of social media buttons with clickable links to your social media profiles. It supports 28 different social networks and provides an option to display buttons as either round or normal icons. Each button opens its respective social media link in a new browser tab.

Key Features

  • Supports 28+ social media platforms including Facebook, Twitter, Instagram, LinkedIn, YouTube, and more
  • Option to display buttons as round or normal icons
  • Built with Font Awesome icons for consistent styling
  • All links open in new tabs with nofollow attributes for SEO
  • Email and Skype links use appropriate protocols (mailto: and skype:)
  • Proper URL sanitization and validation for security
  • Responsive design ready

Usage Notes

  • Enter the full URL to your social media profile (e.g., https://facebook.com/yourprofile)
  • For email, enter only the email address (e.g., contact@example.com)
  • For Skype, enter only the Skype username (e.g., yourusername)
  • The RSS field accepts any valid RSS feed URL
  • All social links are marked with `rel="nofollow"` for SEO purposes
  • Icons display only if their corresponding field has a value
  • Ensure Font Awesome is enqueued in your theme for icons to display properly

Below is the complete list of options available in the "WP Masonry Social Buttons Widget":

Option ID Option Name Description Control Type Accepted Value Default
title Title Widget title displayed above the social buttons. Text Plain text Social Buttons
round_buttons Display round buttons? Toggle between round and normal icon styles. Checkbox true / false false
facebook Facebook URL to your Facebook profile/page. Text (URL) Valid URL (empty)
twitter Twitter URL to your Twitter profile. Text (URL) Valid URL (empty)
googleplus Google Plus URL to your Google+ profile (deprecated but supported). Text (URL) Valid URL (empty)
pinterest Pinterest URL to your Pinterest profile. Text (URL) Valid URL (empty)
linkedin Linkedin URL to your LinkedIn profile. Text (URL) Valid URL (empty)
instagram Instagram URL to your Instagram profile. Text (URL) Valid URL (empty)
flickr Flickr URL to your Flickr profile. Text (URL) Valid URL (empty)
youtube Youtube URL to your YouTube channel. Text (URL) Valid URL (empty)
vimeo Vimeo URL to your Vimeo profile. Text (URL) Valid URL (empty)
soundcloud SoundCloud URL to your SoundCloud profile. Text (URL) Valid URL (empty)
lastfm Lastfm URL to your Last.fm profile. Text (URL) Valid URL (empty)
github Github URL to your GitHub profile. Text (URL) Valid URL (empty)
bitbucket Bitbucket URL to your Bitbucket profile. Text (URL) Valid URL (empty)
tumblr Tumblr URL to your Tumblr blog. Text (URL) Valid URL (empty)
digg Digg URL to your Digg profile. Text (URL) Valid URL (empty)
delicious Delicious URL to your Delicious profile. Text (URL) Valid URL (empty)
stumbleupon Stumbleupon URL to your StumbleUpon profile. Text (URL) Valid URL (empty)
reddit Reddit URL to your Reddit profile. Text (URL) Valid URL (empty)
dribbble Dribbble URL to your Dribbble profile. Text (URL) Valid URL (empty)
behance Behance URL to your Behance profile. Text (URL) Valid URL (empty)
vk VK URL to your VK (VKontakte) profile. Text (URL) Valid URL (empty)
codepen Codepen URL to your CodePen profile. Text (URL) Valid URL (empty)
jsfiddle JSFiddle URL to your JSFiddle profile. Text (URL) Valid URL (empty)
stackoverflow Stack Overflow URL to your Stack Overflow profile. Text (URL) Valid URL (empty)
stackexchange Stack Exchange URL to your Stack Exchange profile. Text (URL) Valid URL (empty)
buysellads BuySellAds URL to your BuySellAds profile. Text (URL) Valid URL (empty)
slideshare SlideShare URL to your SlideShare profile. Text (URL) Valid URL (empty)
skype Skype Your Skype username (used for `skype:` link). Text Skype username (text) (empty)
envelope Email Address Your email address (used for `mailto:` link). Text (Email) Valid email address (empty)
rss RSS Feed URL to your RSS feed. Text (URL) Valid URL (empty)

Code Integration Notes

  • Widget class name: wp_masonry_social_widget
  • Widget ID: wp-masonry-social-profile-widget-id
  • Widget CSS class: wp-masonry-social-profile-widget
  • Widget registration hook: widgets_init
  • Text domain: wp-masonry-pro
  • Icons CSS classes: wp-masonry-social-[network] for links and fa fa-[network] for icons
  • Button style classes: wp-masonry-social-round-icons or wp-masonry-social-normal-icons

Widgets Areas

There are 23 widget areas in the WP Masonry PRO theme.


  1. Header Banner

    This sidebar is located on the header of the web page.

  2. Main Sidebar

    This sidebar is normally located on the left-hand side of web page.

  3. Top Full Width Widgets (Home Page Only)

    This full-width widget area is located at the top of homepage.

  4. Top Full Width Widgets (Posts Only)

    This full-width widget area is located at the top of single post.

  5. Top Full Width Widgets (Posts/Pages Only)

    This full-width widget area is located at the top of single post/page.

  6. Top Full Width Widgets (Every Page)

    This full-width widget area is located at the top of every page.

  7. Bottom Full Width Widgets (Home Page Only)

    This full-width widget area is located at the bottom of homepage.

  8. Bottom Full Width Widgets (Posts Only)

    This full-width widget area is located at the bottom of single post.

  9. Bottom Full Width Widgets (Posts/Pages Only)

    This full-width widget area is located at the bottom of single post/page.

  10. Bottom Full Width Widgets (Every Page)

    This full-width widget area is located at the bottom of every page.

  11. Top Widgets (Home Page Only)

    This widget area is located at the top of homepage.

  12. Top Widgets (Posts Only)

    This widget area is located at the top of single post.

  13. Top Widgets (Posts/Pages Only)

    This widget area is located at the top of single post/page.

  14. Top Widgets (Every Page)

    This widget area is located at the top of every page.

  15. Bottom Widgets (Home Page Only)

    This widget area is located at the bottom of homepage.

  16. Bottom Widgets (Posts Only)

    This widget area is located at the bottom of single post.

  17. Bottom Widgets (Posts/Pages Only)

    This widget area is located at the bottom of single post/page.

  18. Bottom Widgets (Every Page)

    This widget area is located at the bottom of every page.

  19. Post Bottom Widgets

    This widget area is located at the bottom of single post, before the comments.

  20. Footer 1

    This sidebar is located on the left bottom of web page.

  21. Footer 2

    This sidebar is located on the middle bottom of web page.

  22. Footer 3

    This sidebar is located on the middle bottom of web page.

  23. Footer 4

    This sidebar is located on the right bottom of web page.

How to Control Widget Visibility by Location

1. If you'd like to display a widget in specific locations only, please begin by installing and activating the Widget Display Conditions or Widget Context plugin.

2. Drag and drop your widget into any of the widget areas below:

  1. Header Banner
  2. Main Sidebar
  3. Top Full Width Widgets (Every Page)
  4. Bottom Full Width Widgets (Every Page)
  5. Top Widgets (Every Page)
  6. Bottom Widgets (Every Page)
  7. Footer 1
  8. Footer 2
  9. Footer 3
  10. Footer 4

3. If you are using Widget Display Conditions plugin, you will see a button called Display conditions at the bottom of your widget settings. Click on that button.

4. Now click on Add group button.

5. Set your widget display conditions and click save.

Custom Page Templates

WP Masonry PRO includes 11 custom templates in the theme folder: 7 for pages and 4 for posts. The page templates below help you control the page layout (sidebar position or full width) and create special pages like a contact page, an authors list, and a sitemap.

  • Full Width, no sidebar: A wide layout with no sidebar (great for landing pages).
  • Full Width, bottom sidebar: A wide layout with the sidebar shown below the content.
  • Content + Sidebar: A two-column layout (sidebar on the right on desktop).
  • Sidebar + Content: A two-column layout (sidebar on the left on desktop).
  • Contact Form: A page with a built-in contact form (no plugin required).
  • Authors: A page that automatically lists your website’s authors.
  • Sitemap: A page that automatically lists important parts of your site for easier navigation.

How to Assign a Custom Page Template:

  1. Go to WordPress DashboardPagesAdd New (or edit an existing page).
  2. Find the Template setting:
    • In Gutenberg: Open the right sidebar → click the Page tab → find Template.
    • In Classic Editor: Enable the Page Attributes box (Screen Options) → use the Template dropdown.
  3. Select the template you want.
  4. Click Publish or Update.

Full Width, no sidebar (Page Template)

Purpose

Use this template when you want your page content to span the full width of the site, without showing the sidebar.

Where to Find It

  • In WordPress: Edit a page → TemplateFull Width, no sidebar.
  • Template file: template-full-width-page.php

Key Options

  • Comments: Enable/disable comments in the page Discussion settings (comments show only when enabled).
  • Widgets (optional): If you use the theme’s top/bottom widget areas, they can still appear above/below the page.

Notable Behaviors

  • The sidebar is not shown.
  • This affects only the pages where you choose this template.

Full Width, bottom sidebar (Page Template)

Purpose

Use this template when you want a wide page layout, but still want to show your sidebar content below the page.

Where to Find It

  • In WordPress: Edit a page → TemplateFull Width, bottom sidebar.
  • Template file: template-full-width-page-sidebar.php

Key Options

  • Sidebar widgets: Go to AppearanceWidgets and add widgets to Main Sidebar.
  • Comments: Enable/disable comments in the page Discussion settings.

Notable Behaviors

  • The main content is full width; the sidebar appears underneath the content.
  • Works well when you want newsletter/signup widgets or ads after the page content.

Content + Sidebar (Page Template)

Purpose

Use this template for a classic two-column layout: page content plus a sidebar.

Where to Find It

  • In WordPress: Edit a page → TemplateContent + Sidebar.
  • Template file: template-c-s1-page.php

Key Options

  • Sidebar widgets: Add widgets to Main Sidebar in AppearanceWidgets.
  • Comments: Enable/disable comments in the page Discussion settings.

Notable Behaviors

  • On desktop, the sidebar appears on the right and the content on the left.
  • On smaller screens, the sidebar will stack below the content.

Sidebar + Content (Page Template)

Purpose

Use this template when you want the sidebar to appear before the page content (helpful for navigation or category widgets).

Where to Find It

  • In WordPress: Edit a page → TemplateSidebar + Content.
  • Template file: template-s1-c-page.php

Key Options

  • Sidebar widgets: Add widgets to Main Sidebar in AppearanceWidgets.
  • Comments: Enable/disable comments in the page Discussion settings.

Notable Behaviors

  • On desktop, the sidebar appears on the left and the content on the right.
  • On smaller screens, the sidebar will stack below the content.

Contact Form (Page Template)

Purpose

Use this template to create a simple contact page with a built-in form. You can also add your own text (for example, an address or opening hours) above the form.

Where to Find It

  • In WordPress: Edit a page → TemplateContact Form.
  • Template file: template-contact-page.php

Key Options

  • Set the email address: AppearanceCustomizeTheme OptionsContact PageContact Form Email Address.
  • Intro text: Add/edit page content in the editor (it shows above the form).

Note: If you don’t set the contact email address in the Customizer, the form will show an error and won’t send messages.

Notable Behaviors

  • The form asks for Name, Email, Subject, and Message.
  • A simple “math question” helps reduce spam.
  • This template does not show a comments section.

Authors (Page Template)

Purpose

Use this template to create an “Our Authors” / “Team” page that automatically lists authors on your website.

Where to Find It

  • In WordPress: Edit a page → TemplateAuthors.
  • Template file: template-site-authors.php

Key Options

  • Hide admins / hide authors with no posts: AppearanceCustomizeTheme OptionsAuthors Page.
  • Author details: Each user can add their bio and social links in UsersProfile.

Notable Behaviors

  • The page editor content is not shown; the page is filled with the authors list automatically.
  • Typically shows each author’s name, avatar, bio, and social links (if provided).
  • This template does not show a comments section.

Sitemap (Page Template)

Purpose

Use this template to create a sitemap page that helps visitors quickly find content on your site.

Where to Find It

  • In WordPress: Edit a page → TemplateSitemap.
  • Template file: template-sitemap.php

Key Options

  • No special settings are required. The sitemap updates automatically as your site content changes.

Notable Behaviors

  • The page editor content is not shown; the page is filled with the sitemap blocks automatically.
  • Includes sections like Recent Posts, Recent Comments, Pages, Categories, Tags, Archives, and Authors.
  • This template does not show a comments section.

Custom Post Templates

WP Masonry PRO includes 4 custom post templates (part of the 11 custom templates included with the theme). Use them when you want certain posts to look different from your site’s default layout.

  • Full Width, no sidebar: A wide post layout with no sidebar.
  • Full Width, bottom sidebar: A wide post layout with the sidebar shown below the post.
  • Content + Sidebar: A two-column post layout (sidebar on the right on desktop).
  • Sidebar + Content: A two-column post layout (sidebar on the left on desktop).

How to Assign a Custom Post Template:

  1. Go to WordPress DashboardPostsAdd New (or edit an existing post).
  2. Find the Template setting:
    • In Gutenberg: Open the right sidebar → click the Post tab → find Template.
    • In Classic Editor: Look for a Template dropdown (sometimes inside a “Post Attributes” box). If you don’t see it, use Gutenberg for choosing templates.
  3. Select the template you want.
  4. Click Publish or Update.

Full Width, no sidebar (Post Template)

Purpose

Use this template when you want a clean, distraction-free reading experience for a post.

Where to Find It

  • In WordPress: Edit a post → TemplateFull Width, no sidebar.
  • Template file: template-full-width-post.php

Key Options

  • Post Bottom Widgets: Add widgets to Post Bottom Widgets in AppearanceWidgets (shown before comments).
  • Comments: Enable/disable comments for the post (comments show only when enabled).

Notable Behaviors

  • The sidebar is not shown.
  • Includes next/previous post navigation.
  • Shows the Post Bottom Widgets area before the comments section.

Full Width, bottom sidebar (Post Template)

Purpose

Use this template when you want the post to be full width, but still want your sidebar widgets to appear underneath the post.

Where to Find It

  • In WordPress: Edit a post → TemplateFull Width, bottom sidebar.
  • Template file: template-full-width-post-sidebar.php

Key Options

  • Sidebar widgets: Add widgets to Main Sidebar in AppearanceWidgets (shown below the post).
  • Post Bottom Widgets: Add widgets to Post Bottom Widgets (shown before comments).

Notable Behaviors

  • The main content is full width; the sidebar appears underneath the post.
  • Includes next/previous post navigation and the Post Bottom Widgets area.

Content + Sidebar (Post Template)

Purpose

Use this template for a classic two-column post layout: post content plus a sidebar.

Where to Find It

  • In WordPress: Edit a post → TemplateContent + Sidebar.
  • Template file: template-c-s1-post.php

Key Options

  • Sidebar widgets: Add widgets to Main Sidebar in AppearanceWidgets.
  • Post Bottom Widgets: Add widgets to Post Bottom Widgets (shown before comments).

Notable Behaviors

  • On desktop, the sidebar appears on the right and the content on the left.
  • Includes next/previous post navigation.
  • On smaller screens, the sidebar will stack below the content.

Sidebar + Content (Post Template)

Purpose

Use this template when you want the sidebar to appear before the post content (useful for navigation or category widgets).

Where to Find It

  • In WordPress: Edit a post → TemplateSidebar + Content.
  • Template file: template-s1-c-post.php

Key Options

  • Sidebar widgets: Add widgets to Main Sidebar in AppearanceWidgets.
  • Post Bottom Widgets: Add widgets to Post Bottom Widgets (shown before comments).

Notable Behaviors

  • On desktop, the sidebar appears on the left and the content on the right.
  • Includes next/previous post navigation.
  • On smaller screens, the sidebar will stack below the content.

Customizer Theme Options

To see available WordPress Customizer theme options:

  1. Go to your WordPress Dashboard.
  2. Navigate to Appearance → Customize.
  3. Click on Theme Options.

Site Identity Options

Below is the complete list of Site Identity Options available:

Option ID Option Name Description Control Type Accepted Value Default
custom_logo Logo Image ID of the custom logo uploaded through the Customizer. Media Uploader Integer (attachment ID) 0 (none)
blogname Site Title Main title of the website shown in the header, browser-tabs, and search-results. Text A string “My WordPress Site” (installer-set)
blogdescription Tagline Short descriptive sentence (appears next to or below the title when supported by the theme). Text A string “Just another WordPress site”
display_header_text Display Site Title & Tagline Toggles whether the title/tagline are printed on the front-end. When off they remain in the markup for accessibility but are hidden with CSS. Checkbox true / false true
site_icon Site Icon (Favicon) Image ID for the favicon/app-icon (512 × 512 px recommended). Used in browser tabs, bookmark tiles and WP mobile app. Media Uploader Integer (attachment ID) 0 (none)

Colors Options

Below is the complete list of Colors Options available:

Option ID Option Name Description Control Type Accepted Value Default
body_text_colorMain Text ColorPick the Main Text Color.Color PickerHex color code (e.g. #ffffff)#555555
link_colorMain Link ColorPick the Main Link Color.Color PickerHex color code (e.g. #ffffff)#666666
link_hover_colorMain Link Hover ColorPick the Main Link Hover Color.Color PickerHex color code (e.g. #ffffff)#000000
headings_colorGeneral Headings ColorPick the General Headings Color.Color PickerHex color code (e.g. #ffffff)#111111
secondary_menu_colorSecondary Menu Link ColorPick the Secondary Menu Link Color.Color PickerHex color code (e.g. #ffffff)#000000
secondary_menu_shadow_colorSecondary Menu Link Shadow ColorPick the Secondary Menu Link Shadow Color.Color PickerHex color code (e.g. #ffffff)#ffffff
secondary_menu_hover_colorSecondary Menu Link Hover ColorPick the Secondary Menu Link Hover Color.Color PickerHex color code (e.g. #ffffff)#e4002b
secondary_submenu_one_bg_colorSecondary Sub Menu Background ColorPick the Secondary Sub Menu Background Color.Color PickerHex color code (e.g. #ffffff)#eeeeee
secondary_submenu_one_bd_colorSecondary Sub Menu Border ColorPick the Secondary Sub Menu Border Color.Color PickerHex color code (e.g. #ffffff)#dddddd
secondary_menu_icon_colorSecondary Responsive Menu Icon ColorPick the Secondary Responsive Menu Icon Color.Color PickerHex color code (e.g. #ffffff)#000000
header_bg_colorHeader Background ColorPick the Header Background Color.Color PickerHex color code (e.g. #ffffff)#ffffff
primary_menu_bg_colorPrimary Menu Background ColorPick the Primary Menu Background Color.Color PickerHex color code (e.g. #ffffff)#333333
primary_menu_colorPrimary Menu Link ColorPick the Primary Menu Link Color.Color PickerHex color code (e.g. #ffffff)#ffffff
primary_menu_shadow_colorPrimary Menu Link Shadow ColorPick the Primary Menu Link Shadow Color.Color PickerHex color code (e.g. #ffffff)#000000
primary_menu_hover_colorPrimary Menu Link Hover ColorPick the Primary Menu Link Hover Color.Color PickerHex color code (e.g. #ffffff)#ffffff
primary_menu_hover_bg_colorPrimary Menu Link Hover Background ColorPick the Primary Menu Link Hover Background Color.Color PickerHex color code (e.g. #ffffff)#b30703
primary_submenu_one_bg_colorPrimary Sub Menu Background ColorPick the Primary Sub Menu Background Color.Color PickerHex color code (e.g. #ffffff)#444444
primary_submenu_one_bd_colorPrimary Sub Menu Border ColorPick the Primary Sub Menu Border Color.Color PickerHex color code (e.g. #ffffff)#222222
primary_submenu_two_bd_colorPrimary Sub Menu Border 2 ColorPick the Primary Sub Menu Border 2 Color.Color PickerHex color code (e.g. #ffffff)#383838
primary_menu_icon_colorPrimary Responsive Menu Icon ColorPick the Primary Responsive Menu Icon Color.Color PickerHex color code (e.g. #ffffff)#ffffff
header_social_bg_colorHeader Social Bar Background ColorPick the Header Social Bar Background Color.Color PickerHex color code (e.g. #ffffff)#bbbbbb
news_ticker_bg_colorNews Ticker Background ColorPick the News Ticker Background Color.Color PickerHex color code (e.g. #ffffff)#6d6e70
news_ticker_heading_colorNews Ticker Heading ColorPick the News Ticker Heading Color.Color PickerHex color code (e.g. #ffffff)#ffffff
news_ticker_heading_bg_colorNews Ticker Heading Background ColorPick the News Ticker Heading Background Color.Color PickerHex color code (e.g. #ffffff)#333333
news_ticker_text_colorNews Ticker Text ColorPick the News Ticker Text Color.Color PickerHex color code (e.g. #ffffff)#ffffff
news_ticker_hover_text_colorNews Ticker Hover Text ColorPick the News Ticker Hover Text Color.Color PickerHex color code (e.g. #ffffff)#dddddd
sidebar_widget_bg_colorSidebar Widgets Background ColorPick the Sidebar Widgets Background Color.Color PickerHex color code (e.g. #ffffff)#ffffff
sidebar_widget_bd_colorSidebar Widgets Border ColorPick the Sidebar Widgets Border Color.Color PickerHex color code (e.g. #ffffff)#dddddd
grid_post_bg_colorGrid Post Background ColorPick the Grid Post Background Color.Color PickerHex color code (e.g. #ffffff)#ffffff
grid_post_bd_colorGrid Post Border ColorPick the Grid Post Border Color.Color PickerHex color code (e.g. #ffffff)#dddddd
post_title_colorSingle Post Title ColorPick the Single Post Title Color.Color PickerHex color code (e.g. #ffffff)#000000
post_title_hover_colorSingle Post Title Hover ColorPick the Single Post Title Hover Color.Color PickerHex color code (e.g. #ffffff)#333333
list_post_title_colorList Post Title ColorPick the List Post Title Color.Color PickerHex color code (e.g. #ffffff)#000000
list_post_title_hover_colorList Post Title Hover ColorPick the List Post Title Hover Color.Color PickerHex color code (e.g. #ffffff)#333333
grid_post_title_colorGrid Post Title ColorPick the Grid Post Title Color.Color PickerHex color code (e.g. #ffffff)#000000
grid_post_title_hover_colorGrid Post Title Hover ColorPick the Grid Post Title Hover Color.Color PickerHex color code (e.g. #ffffff)#b52e31
post_body_link_colorPost Content Link ColorPick the Post Content Link Color.Color PickerHex color code (e.g. #ffffff)#409BD4
post_body_link_hover_colorPost Content Link Hover ColorPick the Post Content Link Hover Color.Color PickerHex color code (e.g. #ffffff)#08ACD5
postcats_colorPost Categories ColorPick the Post Categories Color.Color PickerHex color code (e.g. #ffffff)#ffffff
postcats_bg_colorPost Categories Background ColorPick the Post Categories Background Color.Color PickerHex color code (e.g. #ffffff)#d29e57
postcats_hover_colorPost Categories Hover ColorPick the Post Categories Hover Color.Color PickerHex color code (e.g. #ffffff)#ffffff
postcats_bg_hover_colorPost Categories Hover Background ColorPick the Post Categories Hover Background Color.Color PickerHex color code (e.g. #ffffff)#000000
post_meta_colorSingle Post Meta ColorPick the Single Post Meta Color.Color PickerHex color code (e.g. #ffffff)#666666
post_meta_hover_colorSingle Post Meta Hover ColorPick the Single Post Meta Hover Color.Color PickerHex color code (e.g. #ffffff)#000000
list_post_meta_colorList Post Meta ColorPick the List Post Meta Color.Color PickerHex color code (e.g. #ffffff)#666666
list_post_meta_hover_colorList Post Meta Hover ColorPick the List Post Meta Hover Color.Color PickerHex color code (e.g. #ffffff)#000000
grid_post_meta_colorGrid Post Meta ColorPick the Grid Post Meta Color.Color PickerHex color code (e.g. #ffffff)#ffffff
grid_post_meta_hover_colorGrid Post Meta Hover ColorPick the Grid Post Meta Hover Color.Color PickerHex color code (e.g. #ffffff)#ffffff
sidebar_title_colorSidebar Title ColorPick the Sidebar Title Color.Color PickerHex color code (e.g. #ffffff)#ffffff
sidebar_title_bg_colorSidebar Title Background ColorPick the Sidebar Title Background Color.Color PickerHex color code (e.g. #ffffff)#333333
sidebar_title_bd_one_colorSidebar Title Border 1 ColorPick the Sidebar Title Border 1 Color.Color PickerHex color code (e.g. #ffffff)#222222
sidebar_title_bd_two_colorSidebar Title Border 2 ColorPick the Sidebar Title Border 2 Color.Color PickerHex color code (e.g. #ffffff)#555555
sidebar_link_colorSidebar Link ColorPick the Sidebar Link Color.Color PickerHex color code (e.g. #ffffff)#444444
sidebar_link_hover_colorSidebar Link Hover ColorPick the Sidebar Link Hover Color.Color PickerHex color code (e.g. #ffffff)#666666
sidebar_list_bd_colorSidebar List Border ColorPick the Sidebar List Border Color.Color PickerHex color code (e.g. #ffffff)#f6f6f6
tag_cloud_colorTag Cloud Link ColorPick the Tag Cloud Link Color.Color PickerHex color code (e.g. #ffffff)#ffffff
tag_cloud_bg_colorTag Cloud Link BackgroundPick the tag Cloud Link Background color.Color PickerHex color code (e.g. #ffffff)#888888
tag_cloud_hover_colorTag Cloud Link Hover ColorPick the Tag Cloud Link Hover Color.Color PickerHex color code (e.g. #ffffff)#ffffff
tag_cloud_hover_bg_colorTag Cloud Link Hover BackgroundPick the tag Cloud Link Hover Background color.Color PickerHex color code (e.g. #ffffff)#000000
footer_bg_colorFooter Background ColorPick the Footer Background Color.Color PickerHex color code (e.g. #ffffff)#333333
footer_bd_colorFooter Border ColorPick the Footer Border Color.Color PickerHex color code (e.g. #ffffff)#333333
footer_title_colorFooter Title ColorPick the Footer Title Color.Color PickerHex color code (e.g. #ffffff)#ffffff
footer_title_bd_one_colorFooter Title Border One ColorPick the Footer Title Border One Color.Color PickerHex color code (e.g. #ffffff)#444444
footer_title_bd_two_colorFooter Title Border Two ColorPick the Footer Title Border Two Color.Color PickerHex color code (e.g. #ffffff)#222222
footer_text_colorFooter Text ColorPick the Footer Text Color.Color PickerHex color code (e.g. #ffffff)#cecece
footer_link_colorFooter Link ColorPick the Footer Link Color.Color PickerHex color code (e.g. #ffffff)#dbdbdb
footer_link_hover_colorFooter Link Hover ColorPick the Footer Link Hover Color.Color PickerHex color code (e.g. #ffffff)#ffffff
footer_list_bd_colorFooter List Border ColorPick the Footer List Border Color.Color PickerHex color code (e.g. #ffffff)#3a3a3a
cp_bg_colorCopyrights Background ColorPick the Copyrights Background Color.Color PickerHex color code (e.g. #ffffff)#222222
cp_bd_colorCopyrights Background ColorPick the Copyrights Background Color.Color PickerHex color code (e.g. #ffffff)#3D3D3D
cp_colorCopyrights Text ColorPick the Copyrights Text Color.Color PickerHex color code (e.g. #ffffff)#ECFFF1
button_text_colorButton Text ColorPick the Button Text Color.Color PickerHex color code (e.g. #ffffff)#ffffff
button_text_shadow_colorButton Text Shadow ColorPick the Button Text Shadow Color.Color PickerHex color code (e.g. #ffffff)#000000
button_bg_colorButton Background ColorPick the Button Background Color.Color PickerHex color code (e.g. #ffffff)#333333
button_bd_colorButton Border ColorPick the Button Border Color.Color PickerHex color code (e.g. #ffffff)#000000
button_hover_bg_colorButton Hover Background ColorPick the Button Hover Background Color.Color PickerHex color code (e.g. #ffffff)#000000
selected_text_colorSelected Text ColorPick the Selected Text Color.Color PickerHex color code (e.g. #ffffff)#ffffff
selected_text_bg_colorSelected Text Background ColorPick the Selected Text Background Color.Color PickerHex color code (e.g. #ffffff)#333333
disable_shadow_colorDisable Shadow ColorDisable Shadow ColorCheckboxtrue / falsefalse

Font Options

Below is the complete list of Font Options available:

Option ID Option Name Description Control Type Accepted Value Default
font_subsetsFont SubsetsSelect which font subsets should be supported.Tdna-Multiple-SelectMixed (depends on setting)(empty)
body_fontsBody Font-FamilyPick a font for body text. Default is Domine.DropdownA font name selected from the available font name list.Domine
body_font_sizeBody Font-SizeChoose body font size. Default is 13px.DropdownA font size value (in px) selected from the available font size list.13px
body_font_weightBody Font-WeightChoose body font weight. Default is 400.Dropdown
  • 400
  • 700
400
body_font_styleBody Font-StyleChoose body font style. Default is normal.Dropdown
  • Normal
  • Italic
Normal
body_line_heightBody Line-HeightEnter body line height. Default is 1.6.Text InputText string1.6
site_title_fontsSite Title Font-FamilyPick a font for site title. Default is Playfair Display.DropdownA font name selected from the available font name list.Playfair Display
site_title_font_sizeSite Title Font-SizeChoose site title font size. Default is 24px.DropdownA font size value (in px) selected from the available font size list.24px
site_title_font_weightSite Title Font-WeightChoose site title font weight. Default is 700.Dropdown
  • 400
  • 700
700
site_title_font_styleSite Title Font-StyleChoose site title font style. Default is normal.Dropdown
  • Normal
  • Italic
Normal
site_title_line_heightSite Title Line-HeightEnter site title line height. Default is 1.Text InputText string1
site_desc_fontsSite Description Font-FamilyPick a font for site description. Default is Domine.DropdownA font name selected from the available font name list.Domine
site_desc_font_sizeSite Description Font-SizeChoose site description font size. Default is 13px.DropdownA font size value (in px) selected from the available font size list.13px
site_desc_font_weightSite Description Font-WeightChoose site description font weight. Default is 400.Dropdown
  • 400
  • 700
400
site_desc_font_styleSite Description Font-StyleChoose site description font style. Default is normal.Dropdown
  • Normal
  • Italic
Normal
site_desc_line_heightSite Description Line-HeightEnter site description line height. Default is 1.Text InputText string1
primary_menu_fontsPrimary Menu Font-FamilyPick a font for the primary menu. Default is Oswald.DropdownA font name selected from the available font name list.Oswald
primary_menu_font_sizePrimary Menu Font-SizeChoose primary menu font size. Default is 13px.DropdownA font size value (in px) selected from the available font size list.13px
primary_menu_font_weightPrimary Menu Font-WeightChoose primary menu font weight. Default is 400.Dropdown
  • 400
  • 700
400
primary_menu_font_stylePrimary Menu Font-StyleChoose primary menu font style. Default is normal.Dropdown
  • Normal
  • Italic
Normal
secondary_menu_fontsSecondary Menu Font-FamilyPick a font for the secondary menu. Default is Oswald.DropdownA font name selected from the available font name list.Oswald
secondary_menu_font_sizeSecondary Menu Font-SizeChoose secondary menu font size. Default is 13px.DropdownA font size value (in px) selected from the available font size list.13px
secondary_menu_font_weightSecondary Menu Font-WeightChoose secondary menu font weight. Default is 400.Dropdown
  • 400
  • 700
400
secondary_menu_font_styleSecondary Menu Font-StyleChoose secondary menu font style. Default is normal.Dropdown
  • Normal
  • Italic
Normal
news_ticker_fontsNews Ticker Font-FamilyPick a font for the news ticker. Default is Oswald.DropdownA font name selected from the available font name list.Oswald
news_ticker_font_sizeNews Ticker Font-SizeChoose news ticker font size. Default is 13px.DropdownA font size value (in px) selected from the available font size list.13px
news_ticker_font_weightNews Ticker Font-WeightChoose news ticker font weight. Default is 400.Dropdown
  • 400
  • 700
400
news_ticker_font_styleNews Ticker Font-StyleChoose news ticker font style. Default is normal.Dropdown
  • Normal
  • Italic
Normal
hpost_title_fontsGrid Post Title Font-FamilyPick a font for grid post titles. Default is Playfair Display.DropdownA font name selected from the available font name list.Playfair Display
hpost_title_font_sizeGrid Post Title Font-SizeChoose grid post title font size. Default is 17px.DropdownA font size value (in px) selected from the available font size list.17px
hpost_title_font_weightGrid Post Title Font-WeightChoose grid post title font weight. Default is 700.Dropdown
  • 400
  • 700
700
hpost_title_font_styleGrid Post Title Font-StyleChoose grid post title font style. Default is normal.Dropdown
  • Normal
  • Italic
Normal
hpost_title_line_heightGrid Post Title Line-HeightEnter grid post title line height. Default is 1.2.Text InputText string1.2
hpost_title_sm_fontsList Post Title Font-FamilyPick a font for list post titles. Default is Playfair Display.DropdownA font name selected from the available font name list.Playfair Display
hpost_title_sm_font_sizeList Post Title Font-SizeChoose list post title font size. Default is 16px.DropdownA font size value (in px) selected from the available font size list.16px
hpost_title_sm_font_weightList Post Title Font-WeightChoose list post title font weight. Default is 700.Dropdown
  • 400
  • 700
700
hpost_title_sm_font_styleList Post Title Font-StyleChoose list post title font style. Default is normal.Dropdown
  • Normal
  • Italic
Normal
hpost_title_sm_line_heightList Post Title Line-HeightEnter list post title line height. Default is 1.2.Text InputText string1.2
hpost_cats_fontsGrid Post Categories Font-FamilyPick a font for grid post categories. Default is Oswald.DropdownA font name selected from the available font name list.Oswald
hpost_cats_font_sizeGrid Post Categories Font-SizeChoose grid post categories font size. Default is 12px.DropdownA font size value (in px) selected from the available font size list.12px
hpost_cats_font_weightGrid Post Categories Font-WeightChoose grid post categories font weight. Default is 400.Dropdown
  • 400
  • 700
400
hpost_cats_font_styleGrid Post Categories Font-StyleChoose grid post categories font style. Default is normal.Dropdown
  • Normal
  • Italic
Normal
hpost_meta_fontsPost Meta Font-FamilyPick a font for post meta. Default is Oswald.DropdownA font name selected from the available font name list.Oswald
hpost_meta_font_sizePost Meta Font-SizeChoose post meta font size. Default is 12px.DropdownA font size value (in px) selected from the available font size list.12px
hpost_meta_font_weightPost Meta Font-WeightChoose post meta font weight. Default is 400.Dropdown
  • 400
  • 700
400
hpost_meta_font_stylePost Meta Font-StyleChoose post meta font style. Default is normal.Dropdown
  • Normal
  • Italic
Normal
post_title_fontsPost Title Font-FamilyPick a font for post titles. Default is Playfair Display.DropdownA font name selected from the available font name list.Playfair Display
post_title_font_sizePost Title Font-SizeChoose post title font size. Default is 26px.DropdownA font size value (in px) selected from the available font size list.26px
post_title_font_weightPost Title Font-WeightChoose post title font weight. Default is 700.Dropdown
  • 400
  • 700
700
post_title_font_stylePost Title Font-StyleChoose post title font style. Default is normal.Dropdown
  • Normal
  • Italic
Normal
post_title_line_heightPost Title Line-HeightEnter post title line height. Default is 1.2.Text InputText string1.2
widget_title_fontsMain/Sidebars Widget Title Font-FamilyPick a font for sidebar widget titles. Default is Oswald.DropdownA font name selected from the available font name list.Oswald
widget_title_font_sizeMain/Sidebars Title Font-SizeChoose main/sidebar title font size. Default is 15px.DropdownA font size value (in px) selected from the available font size list.15px
widget_title_font_weightMain/Sidebars Title Font-WeightChoose main/sidebar title font weight. Default is 400.Dropdown
  • 400
  • 700
400
widget_title_font_styleMain/Sidebars Title Font-StyleChoose main/sidebar title font style. Default is normal.Dropdown
  • Normal
  • Italic
Normal
sidebar_title_line_heightMain/Sidebars Title Line-HeightEnter main/sidebar title line height. Default is 1.Text InputText string1
footer_title_fontsFooter Widget Title Font-FamilyPick a font for footer widget titles. Default is Oswald.DropdownA font name selected from the available font name list.Oswald
footer_title_font_sizeFooter Title Font-SizeChoose footer title font size. Default is 14px.DropdownA font size value (in px) selected from the available font size list.14px
footer_title_font_weightFooter Title Font-WeightChoose footer title font weight. Default is 400.Dropdown
  • 400
  • 700
400
footer_title_font_styleFooter Title Font-StyleChoose footer title font style. Default is normal.Dropdown
  • Normal
  • Italic
Normal
footer_title_line_heightFooter Title Line-HeightEnter footer title line height. Default is 1.Text InputText string1
headings_fontsGeneral Headings Font-FamilyPick a font for general headings. Default is Playfair Display.DropdownA font name selected from the available font name list.Playfair Display
headings_line_heightGeneral Headings Line-HeightEnter general headings line height. Default is 1.Text InputText string1
h1_font_sizeH1 Font-SizeChoose H1 font size. Default is 32px.DropdownA font size value (in px) selected from the available font size list.32px
h1_font_weightH1 Font-WeightChoose H1 font weight. Default is 700.Dropdown
  • 400
  • 700
700
h1_font_styleH1 Font-StyleChoose H1 font style. Default is normal.Dropdown
  • Normal
  • Italic
Normal
h2_font_sizeH2 Font-SizeChoose H2 font size. Default is 28px.DropdownA font size value (in px) selected from the available font size list.28px
h2_font_weightH2 Font-WeightChoose H2 font weight. Default is 700.Dropdown
  • 400
  • 700
700
h2_font_styleH2 Font-StyleChoose H2 font style. Default is normal.Dropdown
  • Normal
  • Italic
Normal
h3_font_sizeH3 Font-SizeChoose H3 font size. Default is 24px.DropdownA font size value (in px) selected from the available font size list.24px
h3_font_weightH3 Font-WeightChoose H3 font weight. Default is 700.Dropdown
  • 400
  • 700
700
h3_font_styleH3 Font-StyleChoose H3 font style. Default is normal.Dropdown
  • Normal
  • Italic
Normal
h4_font_sizeH4 Font-SizeChoose H4 font size. Default is 20px.DropdownA font size value (in px) selected from the available font size list.20px
h4_font_weightH4 Font-WeightChoose H4 font weight. Default is 700.Dropdown
  • 400
  • 700
700
h4_font_styleH4 Font-StyleChoose H4 font style. Default is normal.Dropdown
  • Normal
  • Italic
Normal
h5_font_sizeH5 Font-SizeChoose H5 font size. Default is 18px.DropdownA font size value (in px) selected from the available font size list.18px
h5_font_weightH5 Font-WeightChoose H5 font weight. Default is 700.Dropdown
  • 400
  • 700
700
h5_font_styleH5 Font-StyleChoose H5 font style. Default is normal.Dropdown
  • Normal
  • Italic
Normal
h6_font_sizeH6 Font-SizeChoose H6 font size. Default is 16px.DropdownA font size value (in px) selected from the available font size list.16px
h6_font_weightH6 Font-WeightChoose H6 font weight. Default is 700.Dropdown
  • 400
  • 700
700
h6_font_styleH6 Font-StyleChoose H6 font style. Default is normal.Dropdown
  • Normal
  • Italic
Normal

Header Options

Below is the complete list of Header Options available:

Option ID Option Name Description Control Type Accepted Value Default
hide_social_barHide Header Social BarTurn on or off hide Header Social Bar.Checkboxtrue / falsefalse
site_header_styleHeader StyleSelect site header style.Radio Buttons
  • Logo (left-side) + Menu (right-side)
  • Logo (full-width) + Menu (full-width)
  • Logo (left-side) + Banner (right-side)
  • Logo (full-width) + Banner (full-width)
  • Logo (full-width)
Logo (full-width)
hide_header_contentHide Header ContentTurn on or off hide Header Content.Checkboxtrue / falsefalse
disable_featured_headerDisable Featured Header ImageDisable Featured Header ImageCheckboxtrue / falsefalse

Layout Options

Below is the complete list of Layout Options available:

Option ID Option Name Description Control Type Accepted Value Default
non_singular_layoutNon-Singular Layout StyleSelect your layout style for non-singular pages.Radio Buttons
  • Sidebar + Content
  • Content + Sidebar
  • One Column
One Column
singular_layoutSingular Layout StyleSelect your layout style for singular posts/pages.Radio Buttons
  • Sidebar + Content
  • Content + Sidebar
  • One Column
Content + Sidebar
show_sidebar_one_columnShow Sidebar on One Column LayoutTurn on or off show Sidebar on One Column Layout.Checkboxtrue / falsefalse

News Ticker Options

Below is the complete list of News Ticker Options available:

Option ID Option Name Description Control Type Accepted Value Default
enable_news_tickerEnable News TickerEnable News TickerCheckboxtrue / falsefalse
news_ticker_headingNews Ticker HeadingSet the news Ticker Heading.Text InputText string(empty)
news_ticker_lengthNumber of News Ticker PostsEnter the number of posts you need to display in the news ticker area. Default is 5 posts.Number InputInteger5
news_ticker_post_typeNews Ticker Posts TypeSelect a post type to display in news ticker.Dropdown
  • Recent Posts
  • Popular Posts
  • Random Posts
  • Category Posts
  • Tag Posts
Recent Posts
news_ticker_catNews Ticker Posts CategorySelect a category if Posts Type option is Category PostsNumber InputInteger0
news_ticker_tagNews Ticker Posts TagSelect a tag if Posts Type option is Tag PostsNumber InputInteger0

Post Options

Below is the complete list of Post Options available:

Option ID Option Name Description Control Type Accepted Value Default
hide_posts_headingHide HomePage Posts HeadingTurn on or off hide HomePage Posts Heading.Checkboxtrue / falsefalse
posts_headingHomePage Posts HeadingSet the homePage Posts Heading.Text InputText string(empty)
thumbnail_linkThumbnail LinkDo you want single post thumbnail to be linked to their post?Dropdown
  • Yes
  • No
Yes
grid_thumb_stylePosts Grid Thumbnails StyleSelect the thumbnail style you need for the post grid.Dropdown
  • Horizontal Thumbnails
  • Square Thumbnails
  • Vertical Thumbnails
  • Auto Height Thumbnails
Auto Height Thumbnails
post_grid_colsPosts Grid ColumnsSelect the number of columns in the post grid in desktop view.Dropdown
  • 2 Columns
  • 3 Columns
  • 4 Columns
  • 5 Columns
4 Columns
read_more_lengthAuto Post Summary LengthEnter the number of words need to display in the post summary. Default is 20 words.Number InputInteger20
show_post_snippetShow Post SnippetTurn on or off show Post Snippet.Checkboxtrue / falsefalse
hide_posted_date_homeHide Posted Date from Posts SummariesTurn on or off hide Posted Date from Posts Summaries.Checkboxtrue / falsefalse
hide_posted_dateHide Posted Date from Single PostsTurn on or off hide Posted Date from Single Posts.Checkboxtrue / falsefalse
hide_post_author_homeHide Post Author from Posts SummariesTurn on or off hide Post Author from Posts Summaries.Checkboxtrue / falsefalse
hide_post_authorHide Post Author from Single PostsTurn on or off hide Post Author from Single Posts.Checkboxtrue / falsefalse
hide_post_categories_homeHide Post Categories from Posts SummariesTurn on or off hide Post Categories from Posts Summaries.Checkboxtrue / falsefalse
hide_post_categoriesHide Post Categories from Single PostsTurn on or off hide Post Categories from Single Posts.Checkboxtrue / falsefalse
hide_post_tags_homeHide Post Tags from Posts SummariesTurn on or off hide Post Tags from Posts Summaries.Checkboxtrue / falsefalse
hide_post_tagsHide Post Tags from Single PostsTurn on or off hide Post Tags from Single Posts.Checkboxtrue / falsefalse
hide_comments_link_homeHide Comment Link from Posts SummariesTurn on or off hide Comment Link from Posts Summaries.Checkboxtrue / falsefalse
hide_comments_linkHide Comment Link from Single PostsTurn on or off hide Comment Link from Single Posts.Checkboxtrue / falsefalse
hide_post_editHide Post Edit LinkTurn on or off hide Post Edit Link.Checkboxtrue / falsefalse
hide_thumbnailHide Thumbnails from Every PageTurn on or off hide Thumbnails from Every Page.Checkboxtrue / falsefalse
hide_thumbnail_singleHide Thumbnails from Posts/PagesTurn on or off hide Thumbnails from Posts/Pages.Checkboxtrue / falsefalse
hide_share_buttons_homeHide Share Buttons from Posts SummariesTurn on or off hide Share Buttons from Posts Summaries.Checkboxtrue / falsefalse
hide_share_buttonsHide Share Buttons from Single PostsTurn on or off hide Share Buttons from Single Posts.Checkboxtrue / falsefalse
hide_author_bio_boxHide Author Bio BoxTurn on or off hide Author Bio Box.Checkboxtrue / falsefalse
hide_related_postsHide Related Posts from Single PostsTurn on or off hide Related Posts from Single Posts.Checkboxtrue / falsefalse
related_posts_headingRelated Posts HeadingSet the related Posts Heading.Text InputText string(empty)
related_posts_numberNumber of Related PostsChoose the number of posts you need to display in the related posts areaDropdownMixed (depends on setting)4
related_grid_colsRelated Posts ColumnsSelect the number of columns in the related posts in desktop view.Dropdown
  • 2 Columns
  • 3 Columns
  • 4 Columns
  • 5 Columns
4 Columns
show_rpost_snippetShow Related Post SnippetTurn on or off show Related Post Snippet.Checkboxtrue / falsefalse

Authors Page Options

Below is the complete list of Authors Page Options available:

Option ID Option Name Description Control Type Accepted Value Default
authors_page_textAuthors Page ConfigurationFollow these steps to create a authors page:Text InputText string(empty)
hide_admin_authors_pageHide site administrators from Authors pageTurn on or off hide site administrators from Authors page.Checkboxtrue / falsefalse
hide_noposts_authors_pageHide authors with zero posts from Authors pageTurn on or off hide authors with zero posts from Authors page.Checkboxtrue / falsefalse

Contact Page Options

Below is the complete list of Contact Page Options available:

Option ID Option Name Description Control Type Accepted Value Default
contact_page_textContact Page ConfigurationFollow these steps to create a contact page with a built-in contact form:Text InputText string(empty)
contact_form_emailContact Form Email AddressWhen a user contacts you using the built-in contact form of the theme, this is your email address to get these messages.Email InputValid email address(empty)

404 Page Options

Below is the complete list of 404 Page Options available:

Option ID Option Name Description Control Type Accepted Value Default
error_404_heading404 Error Page HeadingEnter the heading for the 404 error page.TextareaMultiline text(empty)
error_404_messageError 404 MessageEnter a message to display on the 404 error page.TextareaMultiline text(empty)

Other Options

Below is the complete list of Other Options available:

Option ID Option Name Description Control Type Accepted Value Default
enable_widgets_block_editorEnable Gutenberg Widget Block EditorEnable Gutenberg Widget Block EditorCheckboxtrue / falsefalse
disable_sticky_menuDisable Sticky MenuDisable Sticky MenuCheckboxtrue / falsefalse
enable_sticky_mobile_menuEnable Sticky Menu on Small ScreenEnable Sticky Menu on Small ScreenCheckboxtrue / falsefalse
disable_primary_menuDisable Primary MenuDisable Primary MenuCheckboxtrue / falsefalse
disable_secondary_menuDisable Secondary MenuDisable Secondary MenuCheckboxtrue / falsefalse
disable_sticky_sidebarDisable Sticky SidebarDisable Sticky SidebarCheckboxtrue / falsefalse
disable_backtotopDisable Back to Top ButtonDisable Back to Top ButtonCheckboxtrue / falsefalse

Reset Settings Options

Below is the complete list of Reset Settings Options available:

Option ID Option Name Description Control Type Accepted Value Default
reset_settingsReset all theme options made for this theme to their default values by clicking the button below.Set the reset all theme options made for this theme to their default values by clicking the button below..Wp-Masonry-Reset-ButtonMixed (depends on setting)(empty)

Performance & SEO Tips

To get the best out of WP Masonry PRO, it's important to optimize your website for both performance and search engines. Below are helpful tips to improve loading speed, user experience, and your site's visibility on search engines and social media:

  • Use Optimized & WebP Images: Compress images using tools like TinyPNG and convert them to WebP format for better performance and smaller file sizes.
  • Enable Caching: Use a caching plugin like WP Super Cache or WP Rocket to reduce load times.
  • Use a CDN: Content Delivery Networks like Cloudflare or BunnyCDN help deliver your website content faster across the globe.
  • Minify CSS & JavaScript: Use a plugin like Autoptimize to reduce file sizes and improve performance.
  • Optimize Fonts: Load Google Fonts asynchronously or host them locally to prevent render-blocking. Or use system fonts for maximum speed.
  • Avoid Unnecessary Plugins: Even though WP Masonry PRO is performance-optimized, using too many plugins can slow down your site. Only install plugins that are essential for your functionality.
  • Set SEO Titles & Meta Descriptions: Use plugins like Yoast SEO or Rank Math to improve on-page SEO and indexability.
  • Display Correct Thumbnails on Social Media: To ensure your post thumbnails appear properly when sharing on Facebook, X (Twitter), or LinkedIn, install an SEO plugin and enable Open Graph and Twitter Card meta tags. Set a featured image for each post.
  • Enable Lazy Loading: Use WordPress’s built-in lazy loading or plugins like a3 Lazy Load to delay off-screen images and speed up initial page load.
  • Clean the Database: Use plugins like WP-Optimize to remove post revisions, spam comments, and transients.
  • Add Structured Data: Enhance search visibility with schema markup using Rank Math or Yoast's advanced schema tools.

Translation & RTL

WP Masonry PRO is fully translation-ready and supports Right-to-Left (RTL) languages like Arabic, Hebrew, and Persian out of the box.

🌐 Translating the Theme

The theme includes a wp-masonry-pro.pot file located in the /languages folder inside the theme directory. You can use this file to create translations in your own language using any of the following tools:

After translating, save your files as:

  • wp-masonry-pro-[language_code].po
  • wp-masonry-pro-[language_code].mo

Place them inside the /languages folder in the theme.

↔️ RTL Language Support

WP Masonry PRO includes built-in RTL support. If your WordPress site language is set to an RTL language, the theme will automatically adjust layout direction, alignment, and spacing accordingly. No extra setup required.

If you're customizing your site with RTL content, make sure your text widgets, menus, and custom styles are also RTL-compatible for best results.

FAQ

In this section, you’ll find quick answers to the most frequently asked questions about using the WP Masonry PRO theme. These cover common scenarios and settings that often confuse new users. If you can’t find your answer here, you can contact our support team for more help.

Why is my logo/site icon/header image/background image missing after upgrading to PRO?

When switching from the free to PRO version, you need to manually reupload your Site Logo, Header Image, Site Icon, and Background Image via Appearance → Customize.

My menus disappeared after theme activation. What should I do?

Go to Appearance → Menus → Manage Locations and reassign your existing menus to the correct theme locations.

How to activate the "Load More" navigation for posts?

  1. Go to AppearanceCustomizeTheme OptionsPost/Posts Navigation Options.
  2. Under the Posts Navigation Type setting, select Load More Button.
  3. Save your changes, and load more button navigation will be enabled for your post listings.

Note: Also you need to deactivated the "WP-PageNavi plugin" if you are using it.

How to activate the "Infinite Scroll" navigation for posts?

  1. Go to AppearanceCustomizeTheme OptionsPost/Posts Navigation Options.
  2. Under the Posts Navigation Type setting, select Infinite Scroll.
  3. Save your changes, and infinite scrolling will be enabled for your post listings.

Note: Also you need to deactivated the "WP-PageNavi plugin" if you are using it.

How do I reset Customizer settings to default?

Go to AppearanceCustomizeTheme OptionsOther Options, then click the Reset Theme Options button. A confirmation dialog will appear. Confirm the action to reset your WordPress Customizer settings.

Troubleshooting

This section covers common technical problems you may encounter while installing, activating, or customizing the WP Masonry PRO theme. Each issue includes practical steps you can follow to quickly resolve the problem and get your site running smoothly. If your specific issue isn’t listed, you can always reach out to our support team for assistance.

Post thumbnails are missing when sharing on social media

Install an SEO plugin like Yoast SEO or Rank Math and enable Open Graph tags. Always set a featured image for each post to ensure proper thumbnails appear when sharing.

I get "The uploaded file exceeds the upload_max_filesize directive" error.

This means your hosting has a small file upload limit. Follow this guide to increase it or use cPanel/File Manager to upload the theme.

Support & Licensing

All our WordPress themes, including WP Masonry PRO, are released under the 100% GPL (General Public License). You can use the theme on unlimited websites and modify the code to suit your needs.

What’s included in free support:

  • Help with theme installation and setup
  • Bug fixes and troubleshooting related to the theme
  • Guidance on using built-in theme features

What’s not included in free support (but available as paid tasks):

  • Theme customization or resolving third-party plugin conflicts
  • Custom coding or feature implementation requests
  • Performance tuning, SEO setup, or server configuration assistance

If you need help or would like to request a paid customization, please contact us. We typically respond within 24–48 hours on working days.

Contact Support

Changelog & Versioning

The following is a log of all updates and changes made to WP Masonry PRO. We recommend always using the latest version to benefit from improvements and new features.

= Version 1.0.6 =

  • Fixed coding issues

= Version 1.0.5 =

  • Fixed coding issues
  • Many improvements

= Version 1.0.4 =

  • Fixed coding issues.
  • Customizer updated.

= Version 1.0.0 =

  • Initial Release

Date Formats

You can use the following date format values to control how dates appear in various places such as custom widgets, post metadata, news tickers, and more. These formats follow the standard PHP date formatting rules used by WordPress. Refer to the table below to choose a format that best fits your design and content style.

Format KeyExample Output
H:i00:50
g:i a12:50 am
g:i A12:50 AM
g:i:s a12:50:48 am
g:i:s A12:50:48 AM
d.m.y27.11.10
Y.m.d2010.11.27
Y-m-d2010-11-27
Y/m/d2010/11/27
m.d.Y11.27.2010
m-d-Y11-27-2010
m/d/Y11/27/2010
d.m.Y27.11.2010
d-m-Y27-11-2010
d/m/Y27/11/2010
m/d/Y g:i:s a11/27/2010 12:50:48 am
m/d/Y g:i:s A11/27/2010 12:50:48 AM
Y/m/d \a\t g:i a2010/11/27 at 12:50 am
Y/m/d \a\t g:i A2010/11/27 at 12:50 AM
d F27 November
F, YNovember, 2010
F j, YNovember 27, 2010
d M Y27 Nov 2010
M j, YNov 27, 2010
M j, Y @ H:iNov 27, 2010 @ 0:50
l, F j, YSaturday, November 27, 2010
l, F jS, YSaturday, November 27th, 2010